
3.1: Making a Scale Model of the Earth-Moon System
- Page ID
- 31549

Because this model is both larger, and more complex that what we have done before, we will divide up the construction of the model, and exploring it scientifically into two separate activities. It is assumed that Activity 3 and Activity 4 will be done sequentially with one following close upon the other.
Science and Engineering Practices
- Developing and using models.
- Using mathematics.
Crosscutting Concepts
- Scale, proportion, and quantity.
- Systems and system models.
Next Generation Science Standards
- Space systems (K-5, 6-8, 9-12).
- The Earth-Moon system (6-8, 9-12).
- Gravitation and orbits (6-8, 9-12).
For the Educator
Facts you need to know
- The Moon is about ¼ the size of the Earth (when you compare diameters).
- The Moon is about 385,000 km (250,000 miles) from Earth (average distance). This is about 30x farther than the Earth is wide.
- The Moon orbits the Earth in about 28 days.
- One side of the Moon always faces the Earth, we call this the near side; the side we never see from Earth is called the far side.
Teaching and Pedagogy
This model of the Earth-Moon system is one of the largest models we will construct in this book – in fact, the completed model is approximately 60 feet in diameter, perfect for an outdoor activity!
In spite of the model being of great size, the materials for the model will fit into a single grocery bag – it turns out that the Earth-Moon system is mostly empty space! This vast amount of space compared to the relatively small Earth and Moon is one of the main things that your students will learn about.
Diagrams of the Earth and Moon in a textbook have to be compressed to fit on a single page. Physical models of the Earth and Moon system have to be made compact enough to fit on a desk top. You could draw or construct such models to correct scale, but the drawing on your page would show an Earth no larger than a BB, and the Moon would be a single speck on the page.
Your first reaction might be: “Those models lie!” In fact, almost every scientific model makes many compromises and simplifications. Some of these compromises are deliberate, others are out of ignorance. Unfortunately, when we become used to the compromises – and no one tells us about them – we come to think of these things as facts.
This will certainly be the first true-to-scale model of the Earth-Moon system your students have seen. It is a wonderful experience to introduce the student to the vastness of space, but just as importantly, we must dig deeper and draw the student’s attention to the compromises that scientific models make. Awareness of how scientists present models will help your students interpret, and understand these models better!
Student Outcomes
What will the student discover?
- The scale of the Earth-Moon system is enormous!
- Almost every diagram of the Earth and Moon depicted in textbooks is wildly out of scale. When we use a 12-inch vinyl playball as the Earth and a rubber T-ball as the Moon, the diameter of the lunar orbit is 60 feet!
- The Moon crosses the sky from East to West each night.
- This east to west motion is called apparent motion, it is caused by the speedy rotation of the Earth on its axis and it is not actually how the Moon moves through space as it orbits the Earth.
- The Moon moves from West to East as it orbits the Earth in space.
- This is the Moon’s true orbital motion which is in the opposite direction of the east to west apparent motion that we see each night. We can see this eastward movement of the Moon from here on Earth, but we must watch the Moon carefully over several nights to observe it!
- Unlike our consistent sunrise and sunset, the time of moonrise and moonset changes by about an hour each night.
- Because the Earth is spinning as the Moon orbits our planet, our Earth must turn more than 360o each day before we can see the Moon again. This means it takes more than 24-hours from one moonrise to the next, and the Moon rises about 50 minutes later each day. Be patient, this fact will be much easier to see in one of our later activities than it is to explain now!
- We can only see one side of the Moon from Earth (the near side), in order to see the far side, we must physically travel through space.
- This unique fact will be explored in several upcoming activities. We will discover both that it is true, and more importantly, why it happens.
What will your students learn about science?
- We will learn that by improving a scientific model, we can begin to answer the Why does that happen? and How does it work? questions – not just the What happens next? questions.
- When we build on and improve a scientific model, we partake in a tradition of scientific inquiry that is literally thousands of years old. Science has no sacred ideas that cannot be challenged. In fact, to be good scientists, we must challenge every idea and scientific model. If the model is robust, it will be able to answer questions and respond to challenges; if it is not, then it must be changed, or even discarded all together!
- Playing with scientific models is important. It helps us ask (and answer!) questions in a kinesthetic way – even before we have the vocabulary and conceptual understanding to frame these questions properly in English!
- Understanding a scientific model physically and kinesthetically often comes before a proper description exists in the language of mathematics or English. ESL students often respond particularly well to a good scientific model and demonstration because they can frame the ideas mentally in their native language first, then acquire the proper English vocabulary right along with everyone else in the classroom. Scientists often invent new vocabulary to describe their discoveries, these terms are generally adopted in almost all languages without translation. Science and mathematics are truly the universal languages of humanity!
- Science lets us explore the shape and structure of things – even when they are too far away for us to actually touch and explore personally.
- By making models of faraway things like the Moon here on Earth, we can begin to understand how they are put together and how they work as they do. Of course, models are just scientific theories made flesh, so to speak; they aren’t perfect and never tell us everything we wish to know – but they do help us frame the next question and point us toward where we may find the answer! In this unit, we will also make comparisons between common things like rain drops and distant things like the Moon. Comparing the structure of these things can help us see the themes in nature and how simple forces like gravity shape almost everything around us!
Conducting the Activity
 This activity involves making a true-scale model of the Earth – Moon system, and this baby is gonna be BIG! Large scale things delight children, and this model is large enough that you will need extra space just to play with it and explore; unless you teach in a gymnasium, this model won’t fit in your classroom. Don’t worry though, the pieces to this model can fit in a plastic grocery bag – you’ll see what I mean as we start constructing the model! The preliminary construction of the model using glue and sharp instruments should probably be carried out by the teacher, especially with younger students; use your own judgement here! Students can decorate and operate the model after it is built.
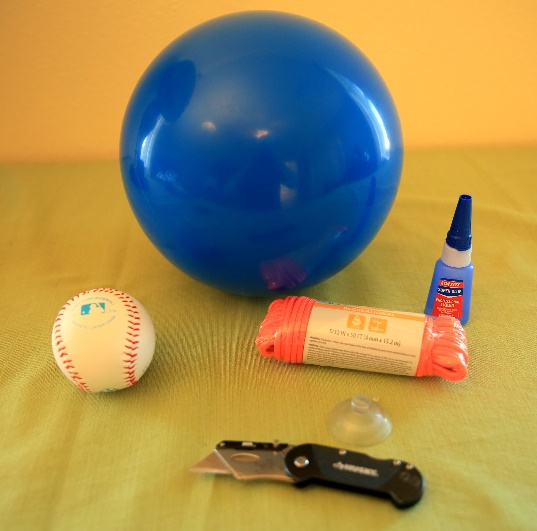
Materials
- Classroom paints and brushes, or permanent markers
- Sidewalk chalk
- One 12-inch vinyl playball (blue is highly preferred)
- One light-colored, 4-inch rubber balls (I used a rubber T-ball baseball)
- 50 ft of stout, non-stretchable cord (clothesline or pull-cord for blinds works well)
- Duct tape (blue is preferred)
Building the Earth-Moon Model
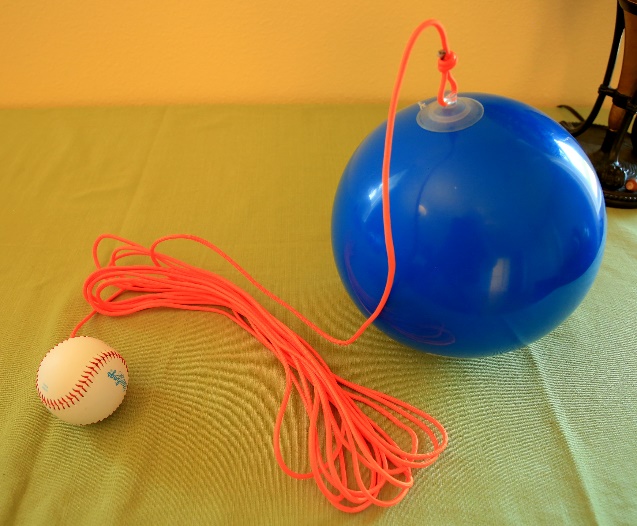
 The larger vinyl play ball will be our Earth, the T-ball will be our Moon. Note that the 4:1 size ratio between these balls reflects the true scale of the size of the Earth and Moon in space!
- [Teacher] Tie a knot in one end of the cord and use an ‘X’ of tape to secure it to the vinyl playball. Alternatively, you can use a suction cup such as those used to hold a soap dish to the shower wall. These vinyl balls usually have a dimple where they are inflated, you will want to keep this clear so the ball can be reinflated if needed. Tape your line to the opposite side of the ball.
- [Teacher] Measure out 30 feet of cord, plus an extra few inches. Cut the cord and save the remainder.
 [Teacher] From the remainder of the cord, tie two knots 6’-10” apart, secure the knots with a few drops of white glue and allow to dry completely. Trim off any extra cord and discard. This cord-measure will show us how far the Moon moves each day as it orbits the Earth!
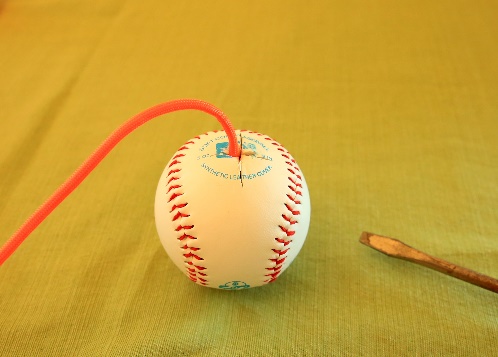
- [Teacher] Put a knot in the end of the cord. (Optional: secure the knot with a drop of white glue and allow to dry completely before proceeding.)
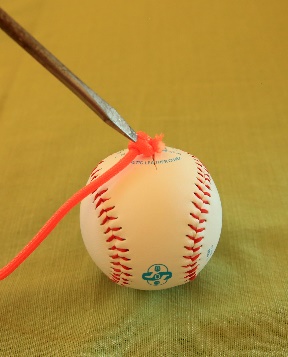
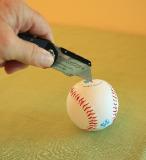
- [Teacher] Secure the knot to the rubber T-ball Moon. The best way to do this is to take a sharp knife (a hobby knife works well) and cut a deep, ½ inch slot in the T-ball. Force the knot into the slot with a screwdriver and seal the slot shut with a few drops of superglue and pinch shut; hot glue also works well.
- Now that the model is built, it can be decorated by students. Remind them that the two pieces are tied together and to be careful of pulling or tripping! The Moon should be painted white if possible – the teacher can do this with spray paint before allowing the students to decorate the Moon if you wish.
- Think of the place where the cord is attached to the Moon as a ‘South Pole’. Draw a bold red ‘equator’ line on the Moon.
- This line is not actually an equator; instead, it will separate the near side from the far side! Label the near side and far side neatly in red.
- Use dark-colored markers or paints to add craters, rays (faint splash marks leading away from a crater in all directions!), and maria (dark-colored seas of frozen lava, usually round or oval in shape.) Some students will wish to be very artistic and use photos of the Moon to make the model look more accurate. But don’t worry if your Moon doesn’t look like the real one in the sky – our model will work just fine the same!
- Now it’s time to decorate the Earth. Consider the place where the knot is attached to the ball to be somewhere along the equator, perhaps out in the Atlantic or Pacific oceans. Once again, some students will want to be very accurate and artistic, others may wish to make a wildly imaginative planet that exists only in their imagination; either way, our model will work just fine!
Exploring the Earth-Moon Model
Now that our model is built, we can do several activities with it, most of these work best outside on the playground area. Although I do not recommend this as a first choice, you can build a smaller, ‘inside the classroom’ model if you wish. If you teach in a school with little play area outside, of if you just wish to conduct the activities inside, this smaller model works just fine. For the smaller model, use the rubber T-ball as the Earth and a glass marble as the Moon. To keep the Earth-Moon distance to scale, remember to make the string connecting them shorter, just 7.5-ft long, and make your measuring string just 2’-4” long. This smaller (and less impressive) model will fit in most classrooms, but at 20 feet wide, it will still cramp you for space in most standard classrooms!