4.5: Under Water Weight
( \newcommand{\kernel}{\mathrm{null}\,}\)
Apparent Weight
When an object is held still under water it appears to weigh less than it does in air because the buoyant force is helping to hold it up (balance its weight). For this reason, the reduced force you need to apply to hold the object is known as the apparent weight. When a scale is used to weigh an object submerged in water the scale will read the apparent weight. When performing hydrostatic weighing for body composition measurement the apparent weight is often called the under water weight ( ).
).
Static Equilibrium
When weighing under water we know the buoyant force must be equal to the difference between the weight and apparent weight because the object remains still, which is a state known as static equilibrium. For an object to be in static equilibrium, all of the forces on it must be balanced so that there is no net force. For the case of under water weighing, the buoyant force plus the force provided by the scale (apparent weight) must perfectly balance the weight of the object, as long as the person is holding still. We can use arrows (vectors) to represent the forces on an object and visualize how they are balanced or unbalanced. This type of diagram is known as a free body diagram (FBD). The FBD for a person undergoing hydrostatic weighing would look like this:
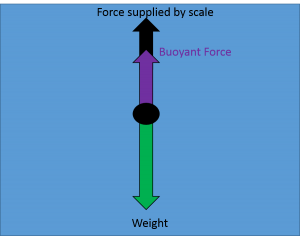
Free body diagram of an object hanging from a scale, submerged in water. The length of the weight arrow is equal to the combined lengths of the force supplied by the scale and the buoyant force. A scale will read the weight that it must supply, therefore it will read an apparent weight for submerged objects that is less than the actual weight.
Archimedes’ Principle
Measuring the weight and apparent weight of a body allows us to calculate its density because the buoyant force that causes the reduction in apparent weight has a special relation to the amount of water being displaced by the body. Archimedes' Principle states that the buoyant force provided by a fluid is equal to the weight of the fluid displaced.
Reinforcement Exercises
Hold your hand under water. Now take an empty water bottle and try to hold it under water.
In which case is the total buoyant force larger? Use Archimedes’ Principle to explain why.

Demonstration of Archimedes’ Principle. The buoyant force is equal to the weight of the water displaced, which in this case is 3 N. The buoyant force cancels out 3 N worth of the objects weight, so the scale only pulls up with 1 N to hold the object in static equilibrium. As a result, the scale reads an apparent weight of only 1 N. Image Credit: “Archimedes-principle” by MikeRun via Wikimedia Commons
Buoyant Force and Density
A given mass of low density tissue will take up volume relative to the same mass of high density tissue. Taking up the volume means more water is displaced when the body is submerged so the buoyant force will be larger compared to the weight than it would be for a more dense body. In turn, that means that apparent weight is smaller relative to actual weight for bodies of higher density. By comparing weight and apparent weight, the body density can be determined. We will do that in the next chapter, but first we should become more familiar with the Buoyant force.
Everyday Example
The water displaced by a brick weighs less than the brick so the buoyant force cannot cancel out the weight of the brick and it will tend to sink (left diagram). To hold the brick in place you must provide the remaining upward force to balance the weight and maintain static equilibrium. That force is less than the weight in air so the brick appears to weigh less in the water (right diagram).
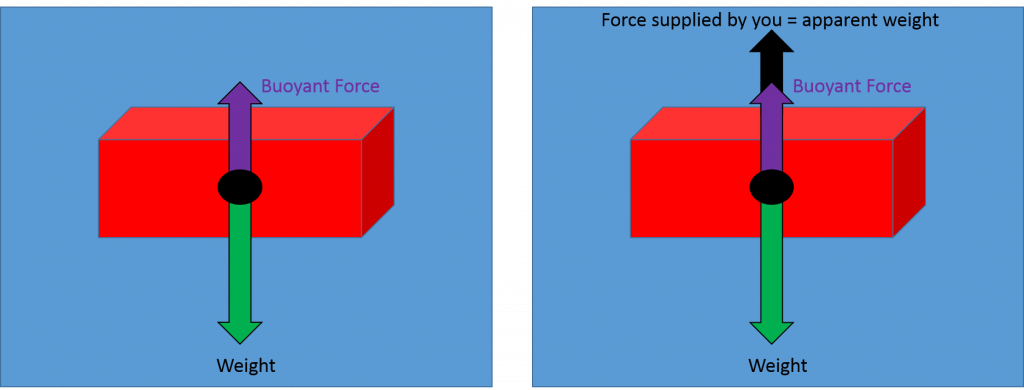
Free body diagrams for bricks in water. The brick on the left is sinking, the brick on the right is being held in place by you.
If you let go of the brick it will be out of equilibrium and sink to the pool bottom. At that point the pool bottom is providing the extra upward force to balance out the weight, and the brick is once again in static equilibrium.
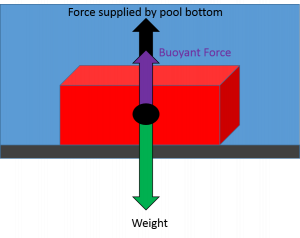
Free body diagram of a brick sitting on the bottom of a pool.
The water displaced by an entire beach ball weighs more than a beach ball, so if you hold one under water the buoyant force will be greater than the weight. Your hand is providing the extra downward force to balance out the forces and maintain static equilibrium (left diagram). When you let go, the forces will be unbalanced and the ball will begin moving upward (right diagram).
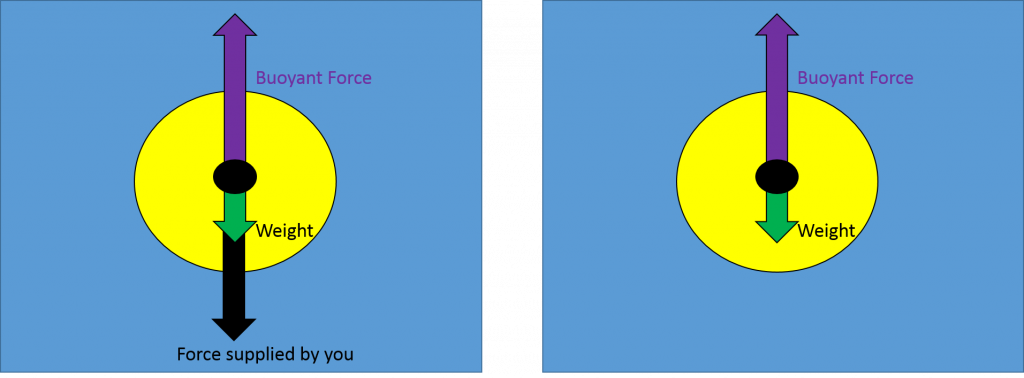
Free body diagrams of a beach ball under water. The ball on the left is held in place by you. The ball on the right will float upwards.
The density of ice is only about 9/10 that of water. The weight of the water displaced by only 9/10 of the iceberg has the same weight as the entire iceberg. Therefore, 1/10 of the iceberg must remain exposed in order for the weight and buoyant forces to be balanced and the iceberg to be in static equilibrium.
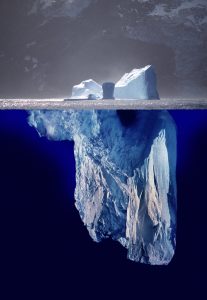
An iceberg floating with roughly 9/10 of its volume submerged. Image Credit: “Iceberg” created by Uwe Kils (iceberg) and User:Wiska Bodo (sky) via Wikimedia Commons
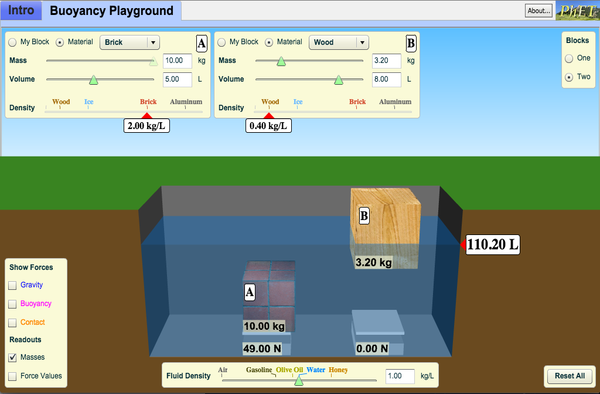
Check out this buoyancy simulation which lets you control how much objects of different masses are submerged and shows you the resulting buoyant force along with forces provided by you and a scale at the bottom of the pool (apparent weight).
Not-So-Everyday Example
Submarines control how much water they displace by pumping water in and out of tanks within the submarine. When water is pumped inside, then that water is not displaced by the sub and it doesn’t count toward increasing the buoyant force. Conversely, when water is pumped out that water is now displaced by the sub and the buoyant force increases, which is the concept behind the maneuver in the following video:
- "Archimedes-principle"By MikeRun [CC BY-SA 4.0 (https://creativecommons.org/licenses/by-sa/4.0)], from Wikimedia Commons↵
- "Iceberg" created by Uwe Kils (iceberg) and User:Wiska Bodo (sky). [GFDL (http://www.gnu.org/copyleft/fdl.html) or CC-BY-SA-3.0 (http://creativecommons.org/licenses/by-sa/3.0/)], via Wikimedia Commons↵


