
12.1: The Pinhole Camera
- Page ID
- 31575

\( \newcommand{\vecs}[1]{\overset { \scriptstyle \rightharpoonup} {\mathbf{#1}} } \)
\( \newcommand{\vecd}[1]{\overset{-\!-\!\rightharpoonup}{\vphantom{a}\smash {#1}}} \)
\( \newcommand{\dsum}{\displaystyle\sum\limits} \)
\( \newcommand{\dint}{\displaystyle\int\limits} \)
\( \newcommand{\dlim}{\displaystyle\lim\limits} \)
\( \newcommand{\id}{\mathrm{id}}\) \( \newcommand{\Span}{\mathrm{span}}\)
( \newcommand{\kernel}{\mathrm{null}\,}\) \( \newcommand{\range}{\mathrm{range}\,}\)
\( \newcommand{\RealPart}{\mathrm{Re}}\) \( \newcommand{\ImaginaryPart}{\mathrm{Im}}\)
\( \newcommand{\Argument}{\mathrm{Arg}}\) \( \newcommand{\norm}[1]{\| #1 \|}\)
\( \newcommand{\inner}[2]{\langle #1, #2 \rangle}\)
\( \newcommand{\Span}{\mathrm{span}}\)
\( \newcommand{\id}{\mathrm{id}}\)
\( \newcommand{\Span}{\mathrm{span}}\)
\( \newcommand{\kernel}{\mathrm{null}\,}\)
\( \newcommand{\range}{\mathrm{range}\,}\)
\( \newcommand{\RealPart}{\mathrm{Re}}\)
\( \newcommand{\ImaginaryPart}{\mathrm{Im}}\)
\( \newcommand{\Argument}{\mathrm{Arg}}\)
\( \newcommand{\norm}[1]{\| #1 \|}\)
\( \newcommand{\inner}[2]{\langle #1, #2 \rangle}\)
\( \newcommand{\Span}{\mathrm{span}}\) \( \newcommand{\AA}{\unicode[.8,0]{x212B}}\)
\( \newcommand{\vectorA}[1]{\vec{#1}} % arrow\)
\( \newcommand{\vectorAt}[1]{\vec{\text{#1}}} % arrow\)
\( \newcommand{\vectorB}[1]{\overset { \scriptstyle \rightharpoonup} {\mathbf{#1}} } \)
\( \newcommand{\vectorC}[1]{\textbf{#1}} \)
\( \newcommand{\vectorD}[1]{\overrightarrow{#1}} \)
\( \newcommand{\vectorDt}[1]{\overrightarrow{\text{#1}}} \)
\( \newcommand{\vectE}[1]{\overset{-\!-\!\rightharpoonup}{\vphantom{a}\smash{\mathbf {#1}}}} \)
\( \newcommand{\vecs}[1]{\overset { \scriptstyle \rightharpoonup} {\mathbf{#1}} } \)
\(\newcommand{\longvect}{\overrightarrow}\)
\( \newcommand{\vecd}[1]{\overset{-\!-\!\rightharpoonup}{\vphantom{a}\smash {#1}}} \)
\(\newcommand{\avec}{\mathbf a}\) \(\newcommand{\bvec}{\mathbf b}\) \(\newcommand{\cvec}{\mathbf c}\) \(\newcommand{\dvec}{\mathbf d}\) \(\newcommand{\dtil}{\widetilde{\mathbf d}}\) \(\newcommand{\evec}{\mathbf e}\) \(\newcommand{\fvec}{\mathbf f}\) \(\newcommand{\nvec}{\mathbf n}\) \(\newcommand{\pvec}{\mathbf p}\) \(\newcommand{\qvec}{\mathbf q}\) \(\newcommand{\svec}{\mathbf s}\) \(\newcommand{\tvec}{\mathbf t}\) \(\newcommand{\uvec}{\mathbf u}\) \(\newcommand{\vvec}{\mathbf v}\) \(\newcommand{\wvec}{\mathbf w}\) \(\newcommand{\xvec}{\mathbf x}\) \(\newcommand{\yvec}{\mathbf y}\) \(\newcommand{\zvec}{\mathbf z}\) \(\newcommand{\rvec}{\mathbf r}\) \(\newcommand{\mvec}{\mathbf m}\) \(\newcommand{\zerovec}{\mathbf 0}\) \(\newcommand{\onevec}{\mathbf 1}\) \(\newcommand{\real}{\mathbb R}\) \(\newcommand{\twovec}[2]{\left[\begin{array}{r}#1 \\ #2 \end{array}\right]}\) \(\newcommand{\ctwovec}[2]{\left[\begin{array}{c}#1 \\ #2 \end{array}\right]}\) \(\newcommand{\threevec}[3]{\left[\begin{array}{r}#1 \\ #2 \\ #3 \end{array}\right]}\) \(\newcommand{\cthreevec}[3]{\left[\begin{array}{c}#1 \\ #2 \\ #3 \end{array}\right]}\) \(\newcommand{\fourvec}[4]{\left[\begin{array}{r}#1 \\ #2 \\ #3 \\ #4 \end{array}\right]}\) \(\newcommand{\cfourvec}[4]{\left[\begin{array}{c}#1 \\ #2 \\ #3 \\ #4 \end{array}\right]}\) \(\newcommand{\fivevec}[5]{\left[\begin{array}{r}#1 \\ #2 \\ #3 \\ #4 \\ #5 \\ \end{array}\right]}\) \(\newcommand{\cfivevec}[5]{\left[\begin{array}{c}#1 \\ #2 \\ #3 \\ #4 \\ #5 \\ \end{array}\right]}\) \(\newcommand{\mattwo}[4]{\left[\begin{array}{rr}#1 \amp #2 \\ #3 \amp #4 \\ \end{array}\right]}\) \(\newcommand{\laspan}[1]{\text{Span}\{#1\}}\) \(\newcommand{\bcal}{\cal B}\) \(\newcommand{\ccal}{\cal C}\) \(\newcommand{\scal}{\cal S}\) \(\newcommand{\wcal}{\cal W}\) \(\newcommand{\ecal}{\cal E}\) \(\newcommand{\coords}[2]{\left\{#1\right\}_{#2}}\) \(\newcommand{\gray}[1]{\color{gray}{#1}}\) \(\newcommand{\lgray}[1]{\color{lightgray}{#1}}\) \(\newcommand{\rank}{\operatorname{rank}}\) \(\newcommand{\row}{\text{Row}}\) \(\newcommand{\col}{\text{Col}}\) \(\renewcommand{\row}{\text{Row}}\) \(\newcommand{\nul}{\text{Nul}}\) \(\newcommand{\var}{\text{Var}}\) \(\newcommand{\corr}{\text{corr}}\) \(\newcommand{\len}[1]{\left|#1\right|}\) \(\newcommand{\bbar}{\overline{\bvec}}\) \(\newcommand{\bhat}{\widehat{\bvec}}\) \(\newcommand{\bperp}{\bvec^\perp}\) \(\newcommand{\xhat}{\widehat{\xvec}}\) \(\newcommand{\vhat}{\widehat{\vvec}}\) \(\newcommand{\uhat}{\widehat{\uvec}}\) \(\newcommand{\what}{\widehat{\wvec}}\) \(\newcommand{\Sighat}{\widehat{\Sigma}}\) \(\newcommand{\lt}{<}\) \(\newcommand{\gt}{>}\) \(\newcommand{\amp}{&}\) \(\definecolor{fillinmathshade}{gray}{0.9}\)Pinhole cameras have been known for centuries – actually long before the invention of photographic plates and film! The revelation that light shining through a tiny hole can create an image of what lies beyond is an exciting revelation that your children are sure to enjoy!
The pinhole camera used to be a more popular activity in the past when cameras were expensive and relatively rare. Miniaturized digital cameras are now on phones, and appear in the most unlikely places, taking away some of the awe and mystery of the camera. Even so, few people understand how a camera actually works, so making one of your own is a profound experience.
Science and Engineering Practices
- Developing and using models.
- Planning and carrying out investigations.
- Analyzing and interpreting data.
- Argument from evidence.
Crosscutting Concepts
- Systems and system models.
- Structure and function.
Next Generation Science Standards
- Space systems (K-5, 6-8, 9-12).
- Engineering and design (K-5, 6-8, 9-12).
- Waves and electromagnetic radiation (6-8, 9-12).
- The Earth-Moon system (6-8, 9-12).
For the Educator
Facts you need to know
The Sun emits three basic kinds of light that reach the surface of the Earth: infrared light which we call heat, visible light, and ultraviolet light which is essential to our health in small doses but can damage skin and eyes if we are not careful. The trick when observing the Sun is to separate the visible light out from the rest! Fortunately, this is easier than it may seem.
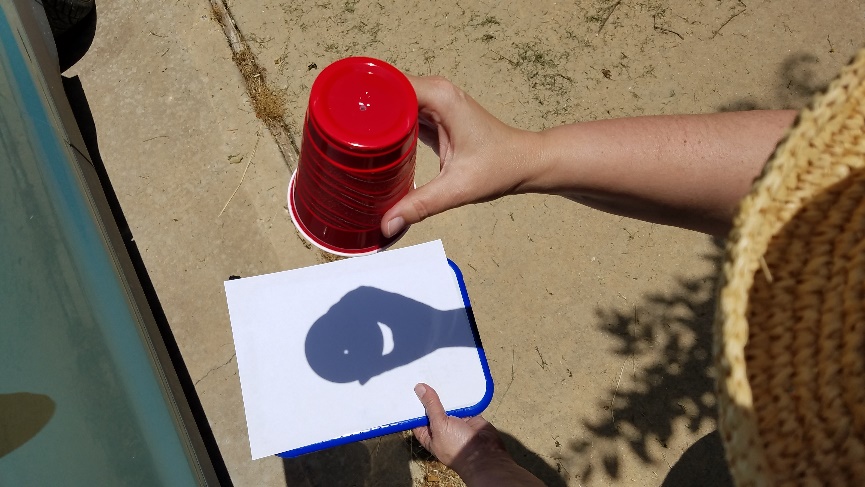
Any time we shine sunlight through a small hole or a lens, we create a round image of the Sun. The bright circle of light isn’t round because the hole through which it shines is round, nor because the lens we use is round; the image is round because the Sun itself is round! This also means that during an eclipse, when the Sun’s image is not round, we should be able to observe this phenomena in action!
Teaching and Pedagogy
This lesson is as much about technology as it is about observations and data. One thing that you can focus on is what the pinhole camera is actually doing. In fact, there are several things going on at once! The aluminum foil is completely opaque – no sunlight passes through this thin layer of metal at all. By taking the light from the tiny hole and allowing it to expand into an image several inches across, you have eliminated almost all of the infrared and ultraviolet light and reduced the brightness of the visible light by several thousand times! This makes our image not only safe, but fun and easy to study and enjoy.
The image of the Sun also has much to tell us. If you can discern tiny dark dots on the solar image – sun spots! – then you will be very fortunate. These cool spots (really!) on the Sun’s surface are up to 1500 degrees colder than the surrounding areas. Cooler means that they shine more dimly, and thus appear dark to us. As it turns out, these sunspots are caused by magnetic storms on the surface of the Sun which allow extra energy to escape, cooling that region off substantially. The magnetic structure of the Sun is a bit beyond the scope of our STEM activities in this book, but it is fun to introduce children to these new ideas!
Student Outcomes
What will the student discover?
- The image of the Sun contains many exciting details that are normally hidden from us because we are blinded by the brightness of the solar disk. By cutting down on the amount of light, these details can be revealed with marvelous precision!
- Solar and lunar eclipses really do look very much the same. The bright object in the sky, whether the Sun or Moon, is gradually blotted out as a dark circle proceeds to cover it. This covering activity takes several hours, but with a solar eclipse, the time when the disk of the Sun is completely covered is very short indeed.
What will your students learn about science?
- Sometimes our scientific curiosity leads us into dangerous places or situations. Often times, the scientist’s answer to this is to create an instrument or mechanism that will allow us to observer and record what is happening in complete safety.
- Observing the Sun is our introduction to this important technique! Looking directly at the Sun is dangerous! Instead we will use instruments to filter out the light we want, and eliminate the more dangerous light we do not want so that we can observe safely!
- Safety First! This is the most important motto for the experimental scientist. Every responsible science teacher stresses – and teaches – safety as part of every lab activity. Every professional scientist thinks about safety as they plan and design experiments, no matter how big or how small.
Conducting the Activity
Materials
- A cardboard container. An oatmeal container works well.
- Scissors and hobby knife
- Lightproof tape (electrical tape or duct tape works well)
- White glue
- Aluminum foil
- Sewing pin
Building the Pinhole Camera Model
- Begin by cutting some holes in your cardboard box with scissors or a hobby knife. For the oatmeal box, cut a square opening about 5-inches on a side in the middle of the box; then cut a 1-inch square hole in the center of the box lid.
- If you are using a copy paper box, cut an 8-inch hole in the lid a bit closer to one end; next, cut a 2-inch square hole in the center of one end. Tape over any seams in the box with duct tap
 e to be sure they are light-proof. Cut a piece of white paper out that fits properly and glue it in the bottom of the oatmeal box. Once this is done, put the lid on and tape in in place with duct tape. If you are using the copy paper box, you can use a full sheet of paper and glue it in the end opposite the 2-inch hole. Once this is done put the lid on – the hole in the lid of the copy box should be closer to the end where you glued in the paper. Tape the lid in place securely with duct tape.
 - Cut a square of aluminum foil large enough to completely cover the end of the oatmeal box and tape it over the end securely with duct tape, this will keep all stray light out of the box for you. Once this is done, puncture the foil carefully with a sewing pin. For the copy paper box, a 3-inch square of foil will be sufficient. Make as small a hole as you can! Smaller holes give dimmer, but sharper images. Larger holes make brighter, but somewhat fuzzier images. If the hole is too large, or if it gets damaged, you can always replace the foil easily. If the hole is too small (image is too dim to see), poke the needle into the hole again and enlarge it just a bit. Your pinhole camera is now ready to use!
Exploring the Pinhole Camera Model
- Hold the box over your head with the large opening in the side facing down, and the foil covered end facing the Sun. If you are doing this correctly, you should be able to look inside the box and see the white paper inside.
- Carefully adjust the direction you have the box pointed until you see a circle of light projected on the paper – this is the image of the Sun!
- Study the solar image carefully, you may see tiny black or grey dots on the solar surface – these are sunspots! With a separate piece of paper, try and map the sunspots you can see. Be aware that the Sun does not have sunspots every day! The solar activity cycle (more active means more sunspots) peaked in 2014 and has been declining. This cycle is 11 years long, and according to astronomers, we are in a period of weak solar activity anyway. Never the less, careful and patient observers will generally be rewarded with the sight of a few sunspots if they observe carefully once a week or so.
- If you have the opportunity to see a partial or complete solar eclipse, you are in for a treat! Your pinhole camera will show you the solar disk clearly, and when the eclipse begins, you will see a black “bite” being taken out of the Sun! As the eclipse progresses, the ‘bite’ will become larger; if you are lucky enough to see a total eclipse, the entire disk of the Sun will go dark!
Discussion Questions
- How does the pinhole camera make it safe to view the Sun?
- Answer: The pinhole cuts out almost all the light.
- Answer: We never look directly at the Sun – only at its image projected on paper.
- Why is the image of the Sun round in a pinhole camera?
- Answer: Because the Sun itself is round!
Supplemental Materials
Going Deeper
You can find many interesting and fun to build designs for pinhole cameras on line, these are also called a Camera Obscura. Many of these designs show how to make a camera with a piece of translucent plastic for a screen.
You can actually project images of trees, landscapes, buildings, almost anything as long as it is well lighted.
Explore some camera obscura designs in your classroom and see what your class can discover about light and images.
Being an Astronomer
If you have the chance to observe an eclipse with a pinhole camera, try drawing a 0.5 cm grid on your projection screen with a fine, permanent marker. As you observe the progress of the eclipse, use the grid to estimate what percentage of the Sun or Moon is obscured by the eclipse.
One easy way to do this is to count the number of squares in the total image of the Sun or Moon (you only need to do this once), then count the number of squares that are darkened. The ratio between these two numbers will give you the percentage of the eclipse at that moment.
If you see a partial eclipse, try to estimate to greatest extent of the eclipse by percentage. Official values for eclipse percentage are often published for solar eclipses and are specific to your location. How close to you get to the official predictions?
Being a Scientist
Modern cameras use lenses to focus light. Find a simple magnifying lens and see if you can get it to project an image of a light bulb onto a piece of paper. How is this similar to your pinhole camera?
See if you can measure the distance between the lens and the focused image in millimeters – this is the focal length of the lens.
Measure the diameter of the lens in millimeters; this is also called the aperture. Now divide the focal length by the diameter of the lens, this is the focal ratio of the lens.
Following Up
Every modern camera and projector system uses lenses to focus and control light. How many examples of lenses in use can you find in your classroom? How about around your school?