
7.1: Bragg’s Law


- Last updated
- Nov 6, 2024
- Save as PDF

( \newcommand{\kernel}{\mathrm{null}\,}\)
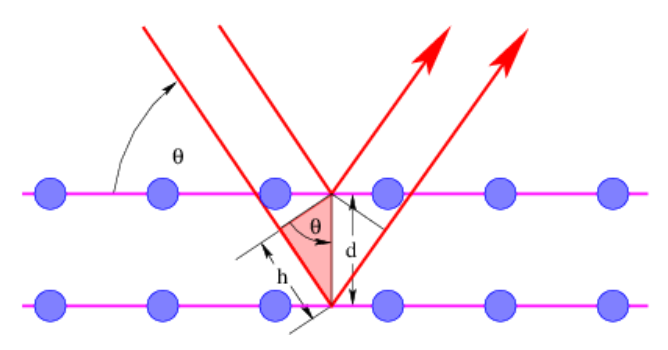
Figure 7.1.1: schematically illustrates interference between waves scattering from two adjacent rows of atoms in a crystal. The net effect of scattering from a single row is equivalent to partial reflection from a mirror imagined to be aligned with the row. Thus, the angle of “reflection” equals the angle of incidence for each row. Interference then occurs between the beams reflecting off different rows of atoms in the crystal.
For the two adjacent rows shown in Figure 7.1.1:, the path difference between beams is 2h=2dsinθ. For constructive interference this must be an integer number of wavelengths, mλ, where the integer m is called the order of interference. The result is Bragg’s law of diffraction:
mλ=2dsinθ,m=1,2,3… (Bragg's law)
If only two rows are involved, the transition from constructive to destructive interference as θ changes is gradual. However, if interference from many rows occurs, then the constructive interference peaks become very sharp with mostly destructive interference in between. This sharpening of the peaks as the number of rows increases is very similar to the sharpening of the diffraction peaks from a diffraction grating as the number of slits increases.